User Guide
The user guide explains how to use the Phoenix web application to interact with Web Processing Services.
Login
Press the Sign in button in the upper right corner.
The login page offers you several options to login to Phoenix.
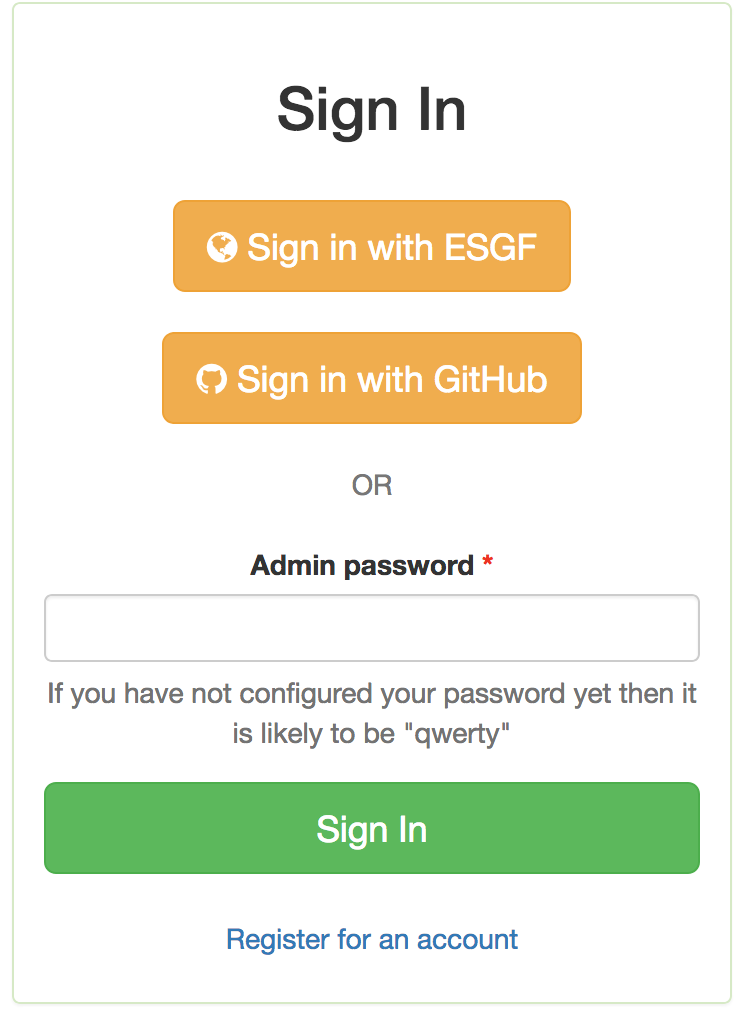
You can login using your ESGF OpenID or your GitHub account. If you login for the first time your account needs to be activated by an administrator.
If you are Phoenix admin you can also enter the admin password here.
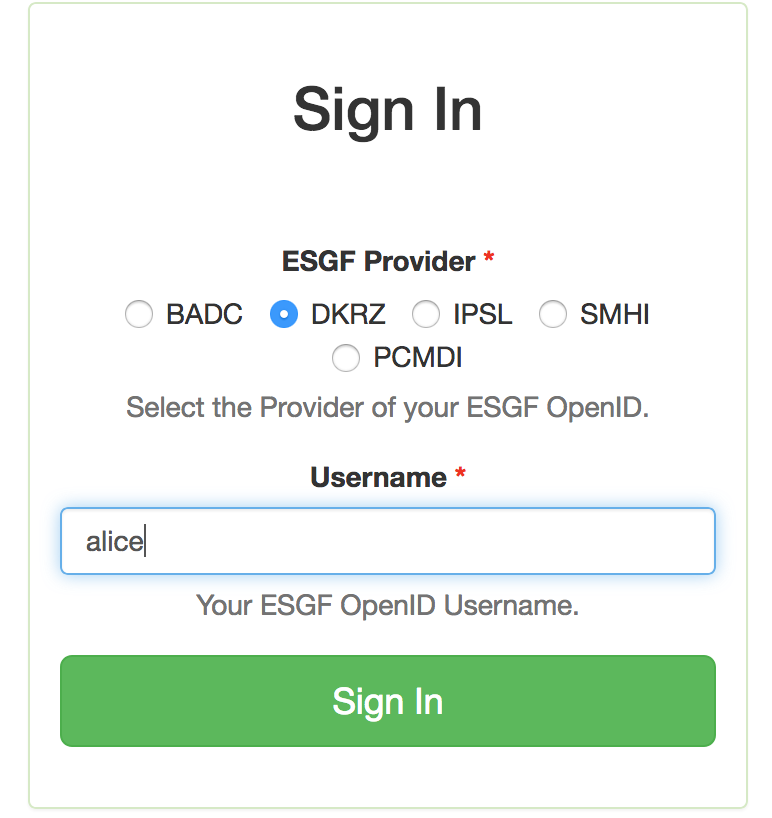
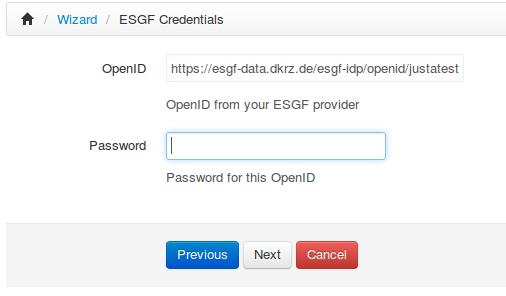
ESGF OpenID
You can use an ESGF OpenID. The ESGF OpenID is used later to access files from ESGF. Make sure, that you have a valid ESGF OpenID of one of the ESGF Providers (for example DKRZ) and that you are able to download a datafile (you need to register for CMIP5 and CORDEX).
Enter the account name of your ESGF OpenID and choose the according ESGF OpenID provider (by default this is DKRZ).
Processes
When you have registered WPS services you can run a process. Go to the
Processes tab.
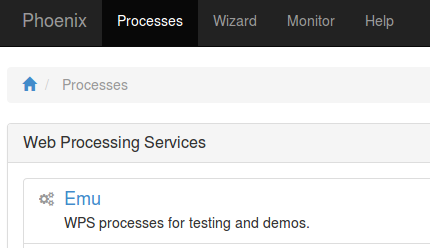
Choose one of your registered WPS services. You will get a list of available processes (WPS GetCapabilities request).
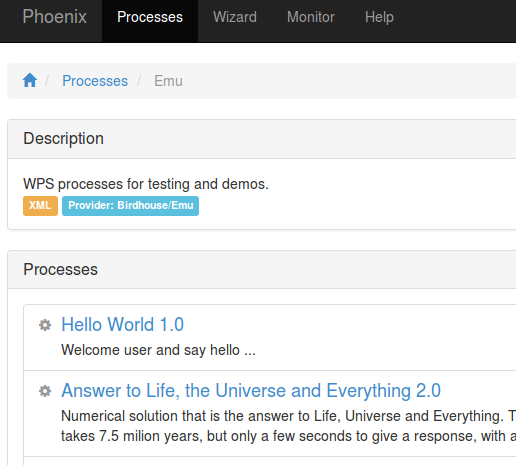
Choose one of these processes by using the Execute button.
In case of Emu you may try the Hello World process. You will then be
prompted to enter your username:
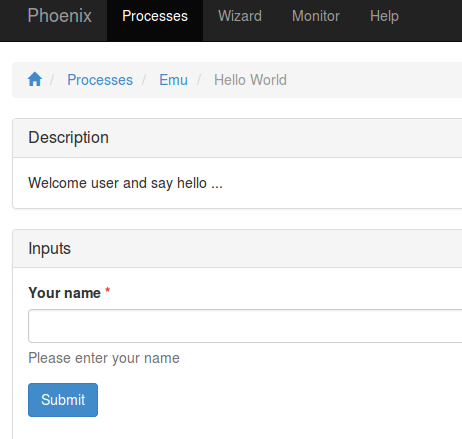
Press the Submit button. When the process is submitted you will be shown your job list in Monitor.
Monitor
In Monitor all your running or finished jobs are listed.
The list shows the status and progress of your jobs.
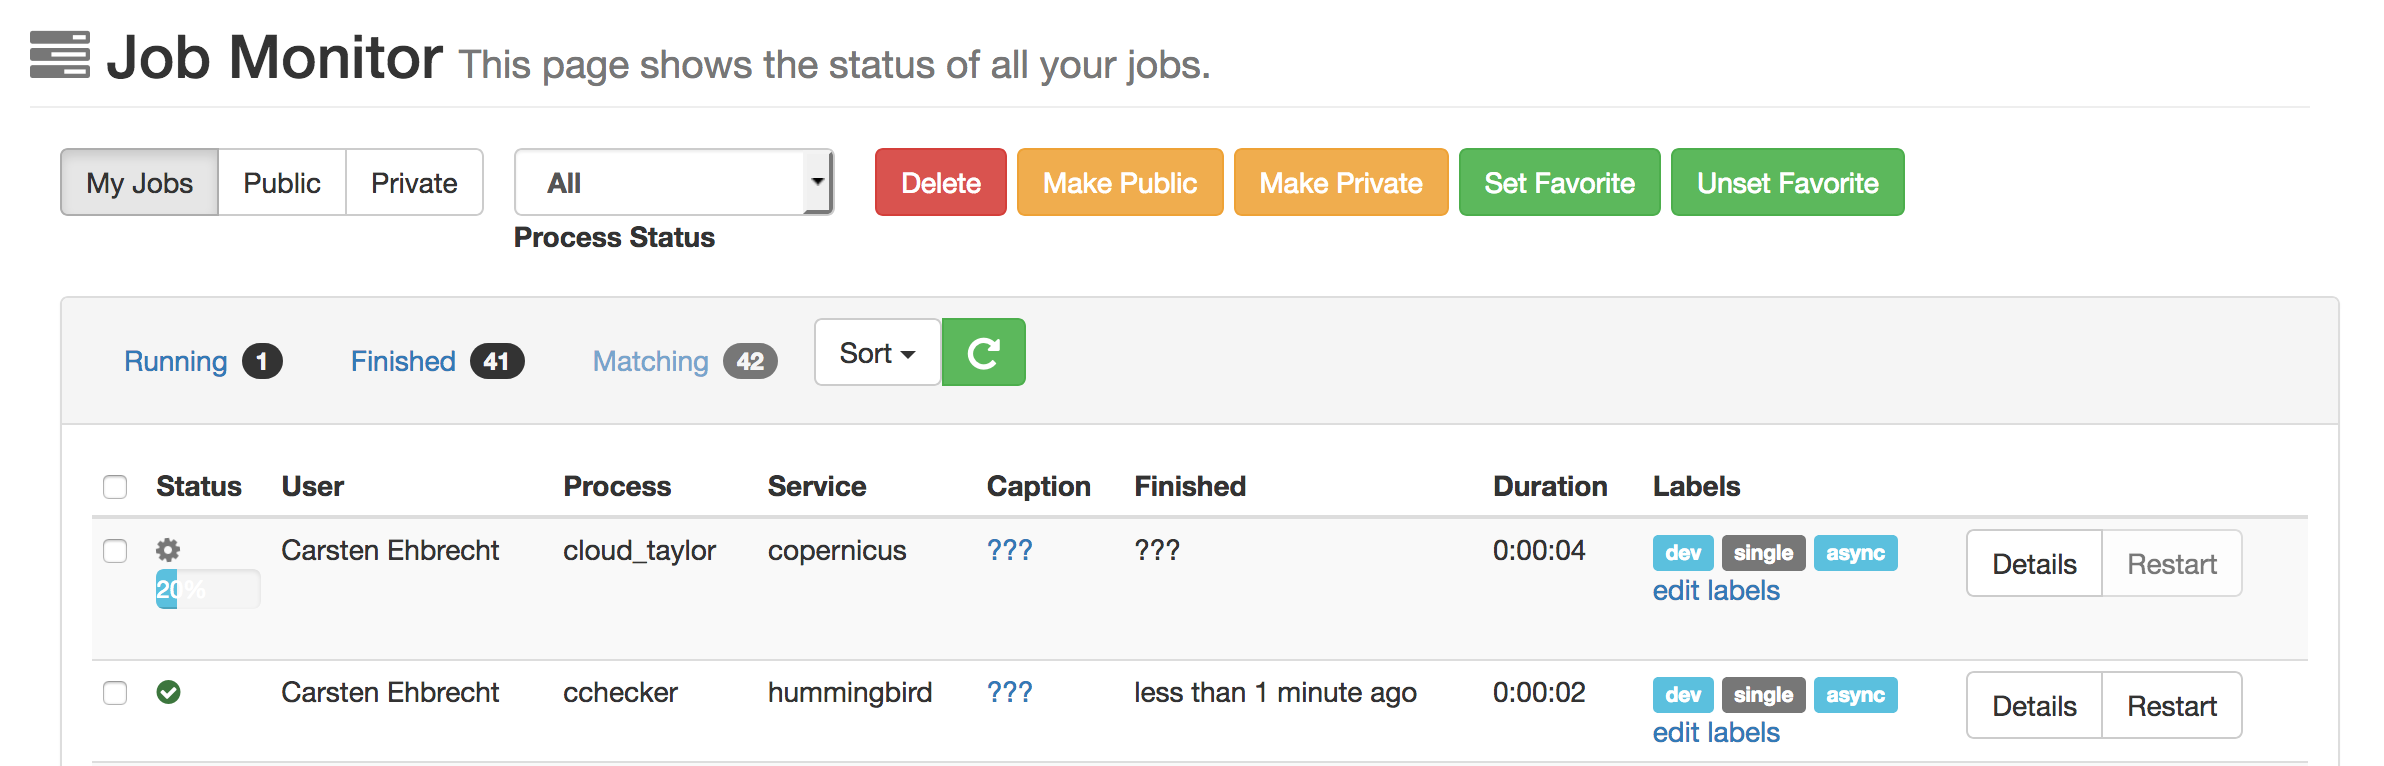
When a job has finished with success you can see the results by clicking the Details button.
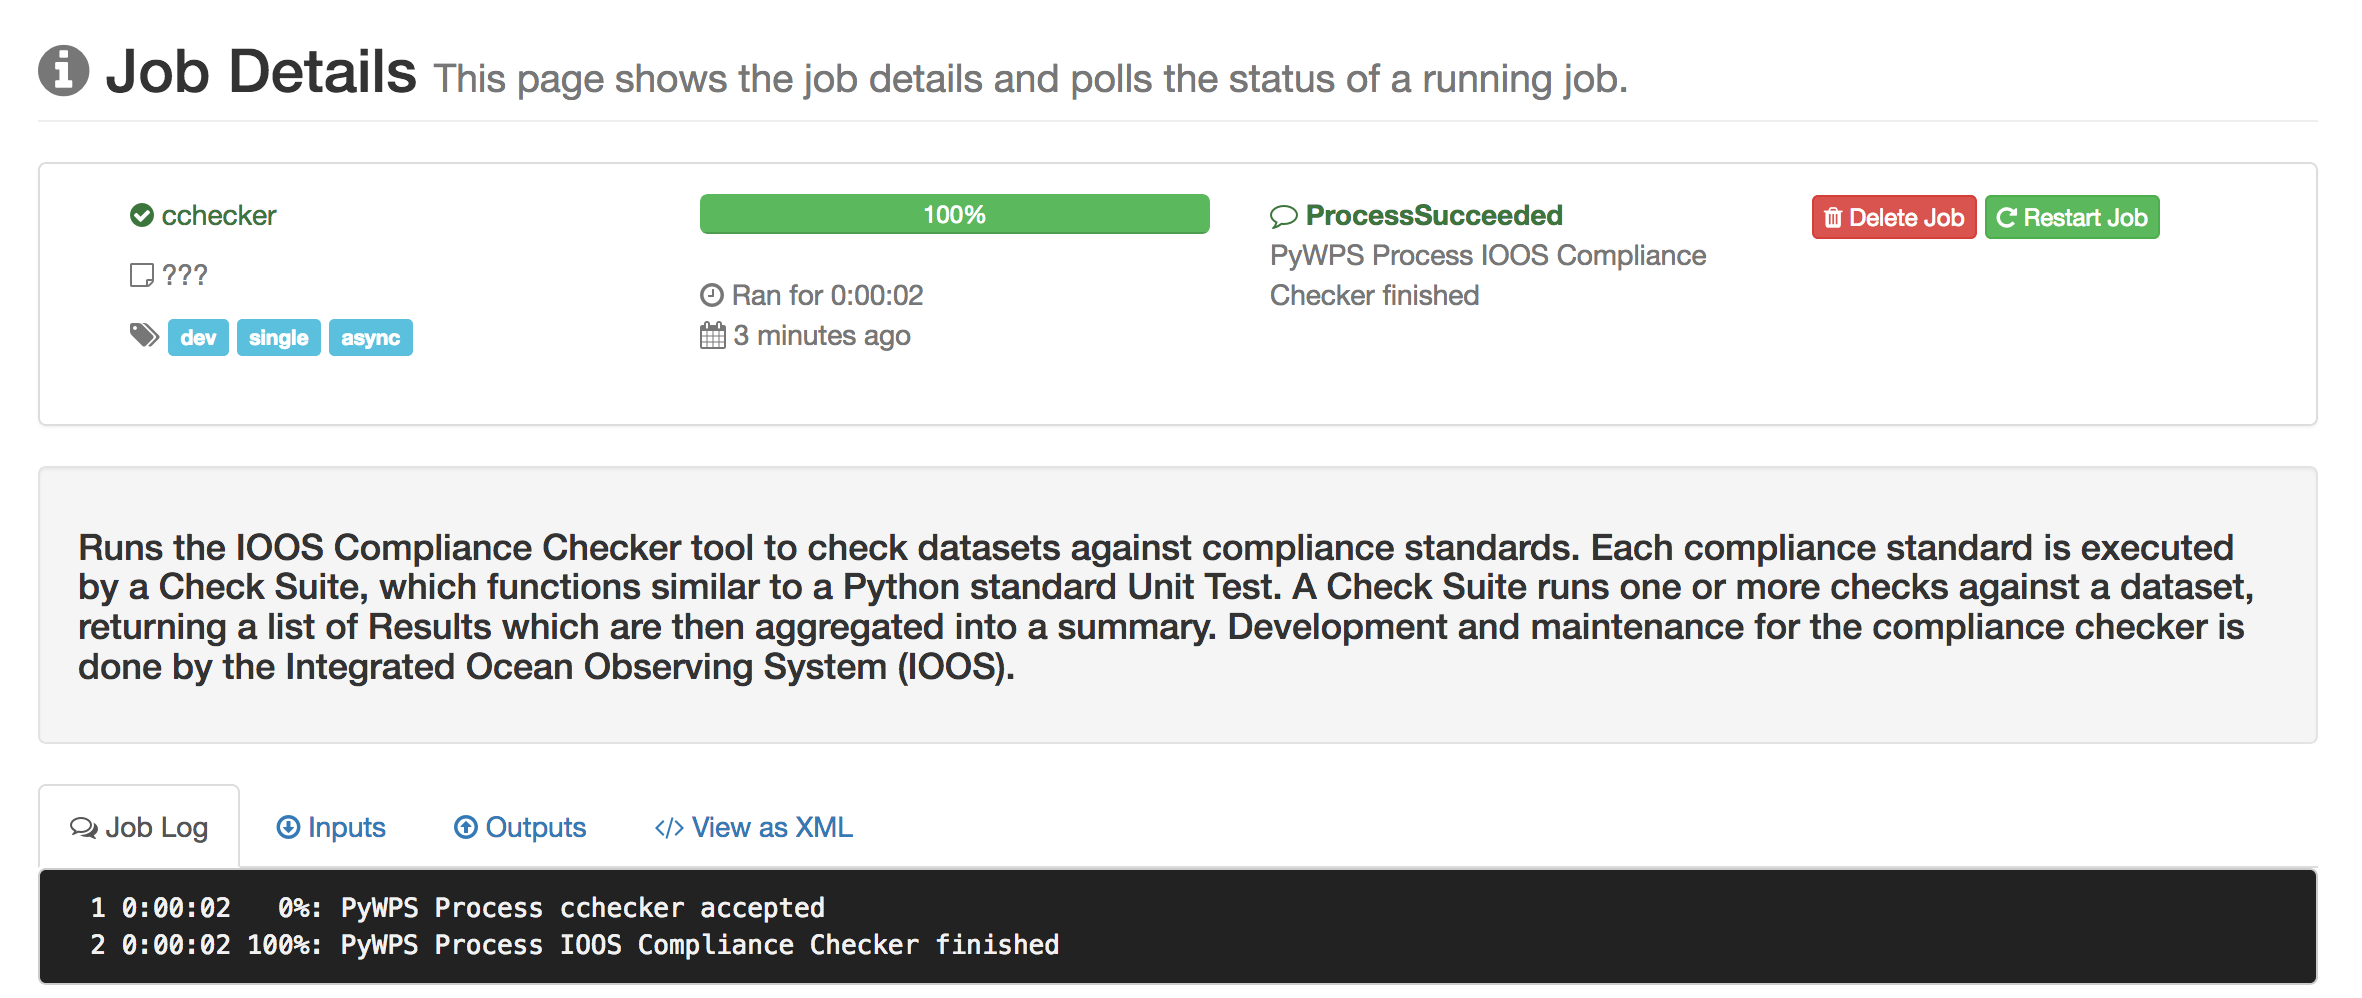
If the result has a document (XML, text, NetCDF, …) you can view or download this document with the Download button.
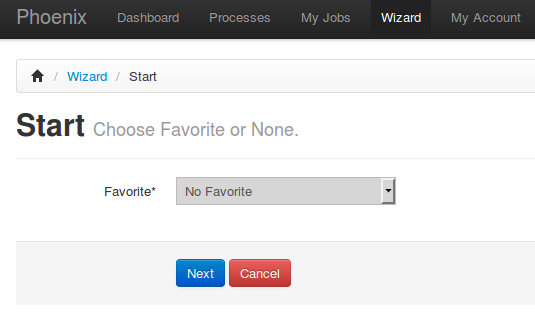
Wizard
The wizard is used to chain WPS processes and to collect the input parameters for the processes. Currently the wizard chains a user WPS process with a WPS process to retrieve ESGF data. The chained processes are run with a workflow management system which is available as WPS process in Malleefowl.
Go to the Wizard tab. Enter the
appropiate parameters and use Next to get to the next wizard
page.
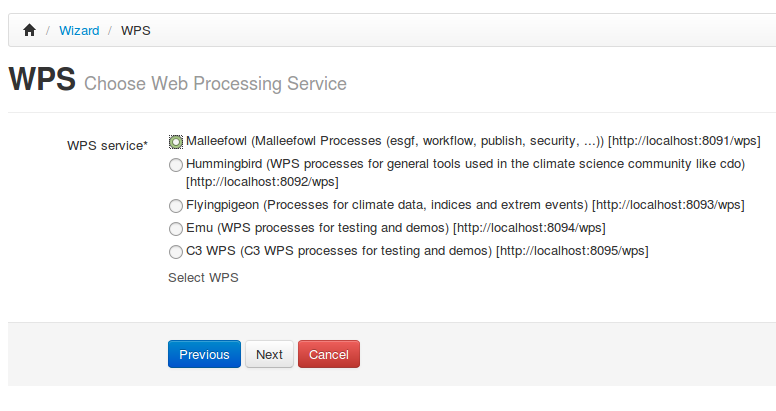
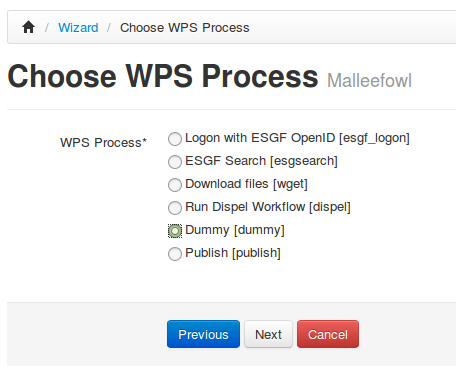
You need to choose a WPS service (e.a. Malleefowl).
Choose a process (in case of Malleefowl only Dummy).
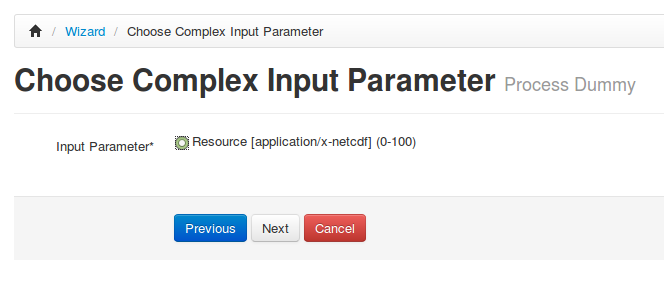
Select the input parameter of the choosen process (mime-type application/netcdf).
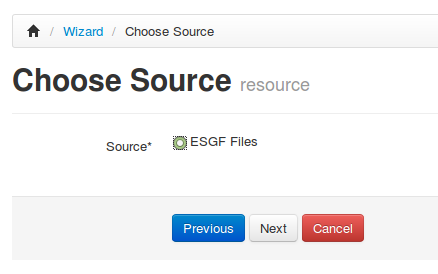
Select the input source (ESGF).
Select an ESGF dataset (select categorie (blue) and values of this category (orange), current selection (green)).
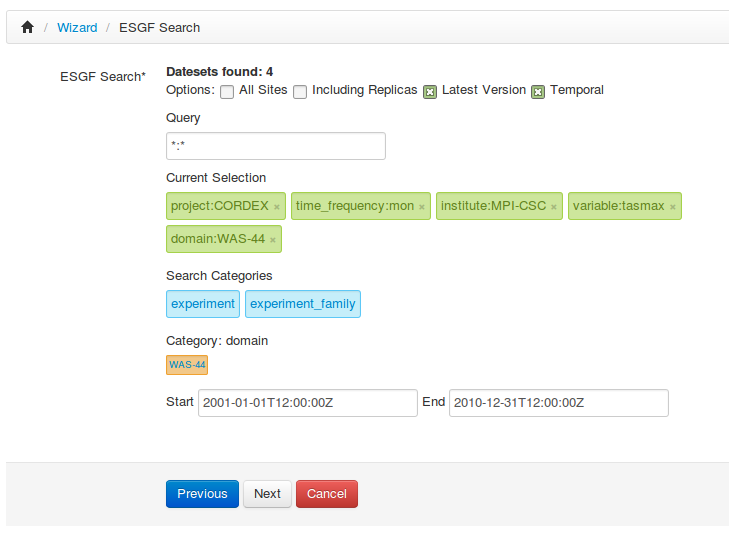
Please select only one Dataset!
You will be prompted for your password of your OpenID if your certificate is not valid anymore.
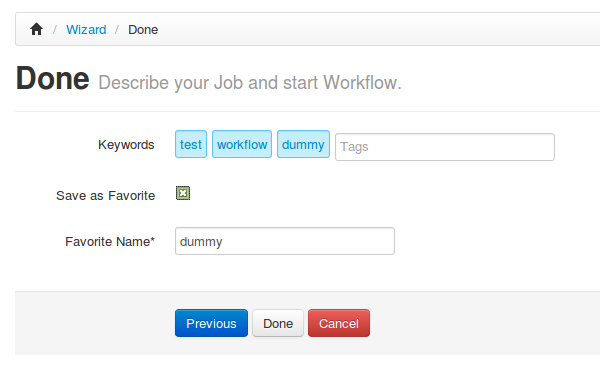
On the final page you can enter some keywords for your process and mark it as favorite (when using a favorite you don’t
need to enter all parameters again). Press Done and the job will be started and shown in your job list My Jobs.
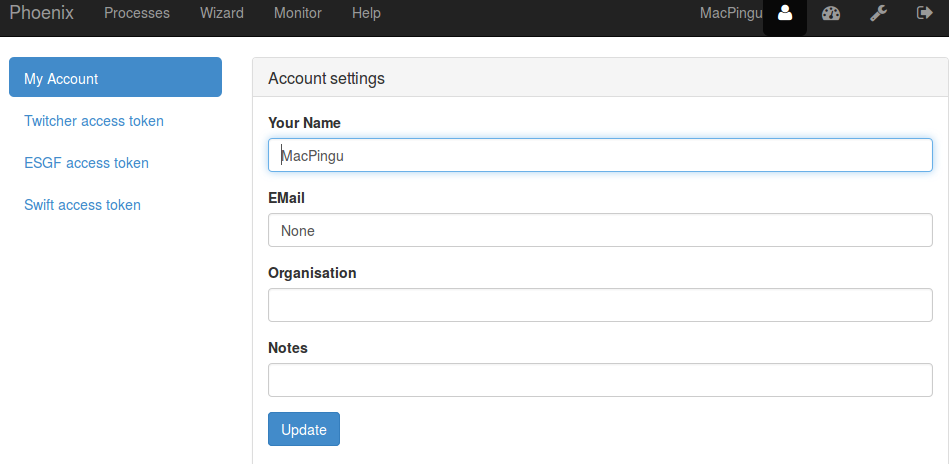
My Account
In My Account you can change your user settings (user name, organisation, openid, …).
You can also see your current Twitcher access token which you can use to access a registered WPS service directly.
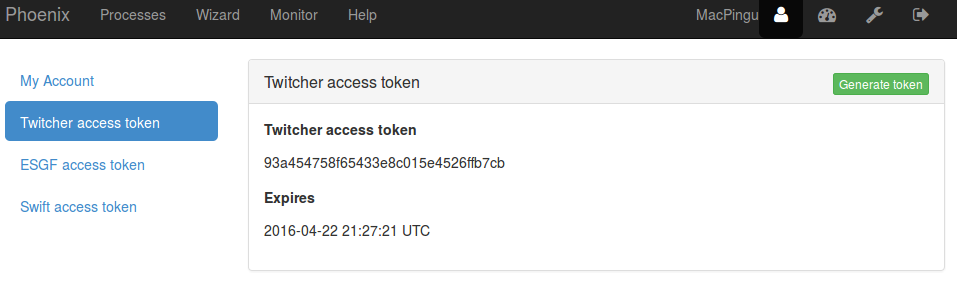
See the Twitcher Tutorial on how to use the token to access a WPS service.
Settings (admins only)
When you are logged-in as admin user you have the Settings page. Here you can make administrative changes and monitor services.
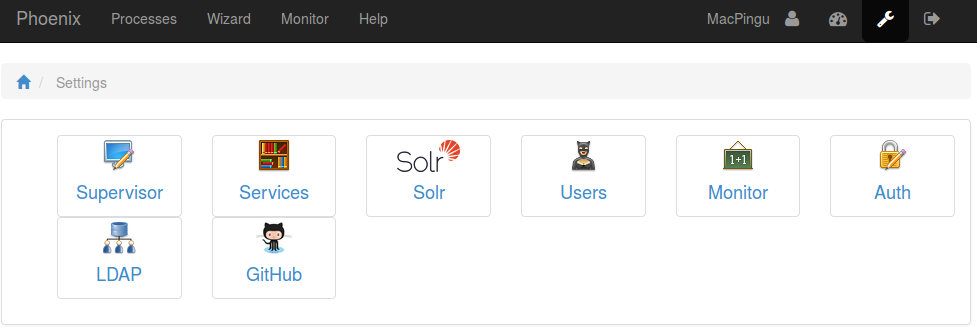
Register a WPS or Thredds service
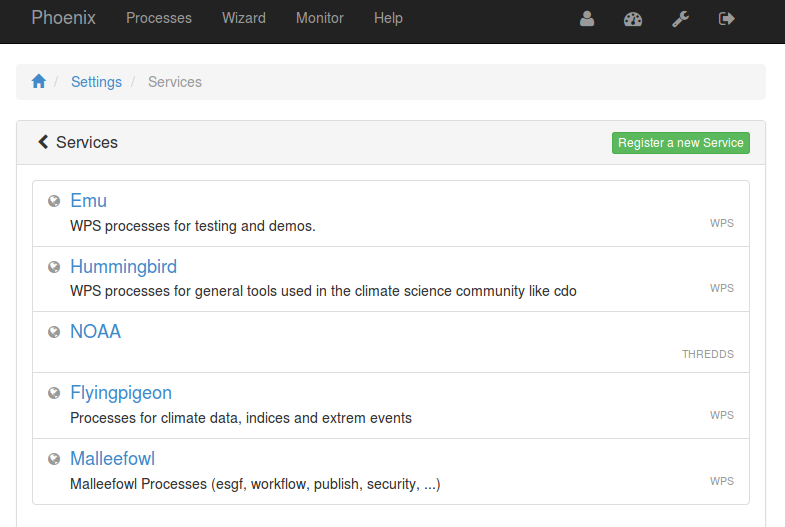
Open the Settings/Services page. Here you can see which services are registered in the catalog service (we are using PyCSW). All theses services are known and useable by Phoenix.
To add a new WPS service, press the Register a new Service button and enter the WPS URL in the field Service URL:
- hummingbird: http://localhost:8092/wps
- flyingpigeon: http://localhost:8093/wps
- emu: http://localhost:8094/wps
For example, to register Malleefowl WPS:
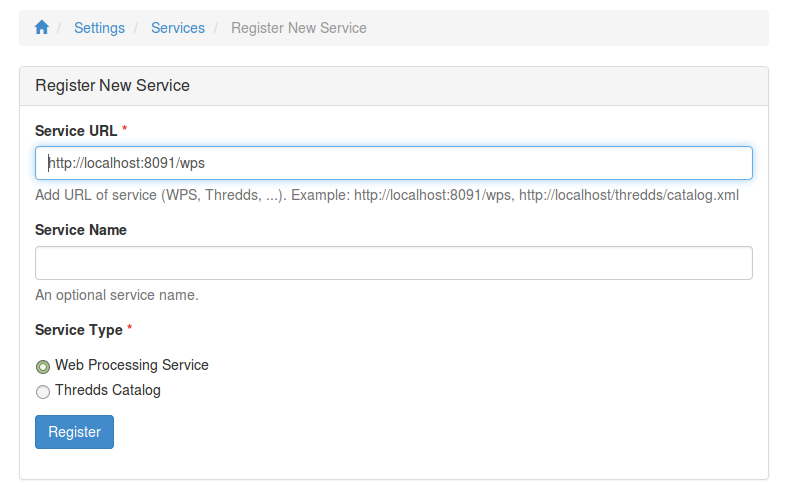
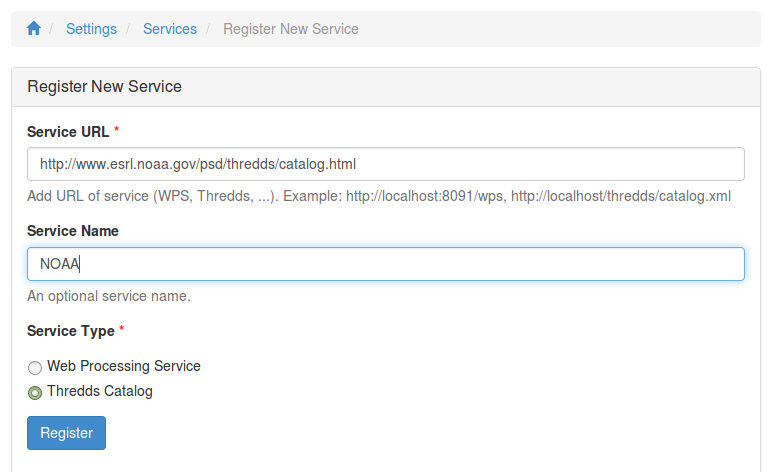
To add a new Thredds service press the Register a new Service button again, enter the Thredds URL and choose Thredds Catalog as service type.
Activate Users
Open the Settings/Users page. Here you activate/deactivate users and also remove them. When a user has registerd to the Phoenix web application the user needs to be activated before the user can login.
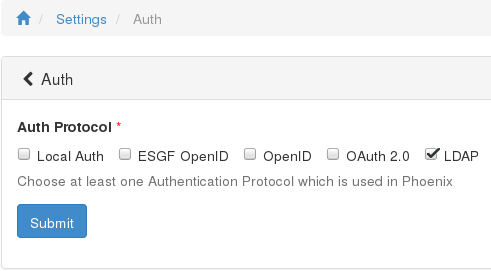
Choose Authentication Protocol
Open the Settings/Auth page. Here you can choose the different authentication protocols (OpenID, LDAP, …) which users can use on the login page. Local Auth enables the local admin account whose password is set in custom.cfg in your Phoenix installation.
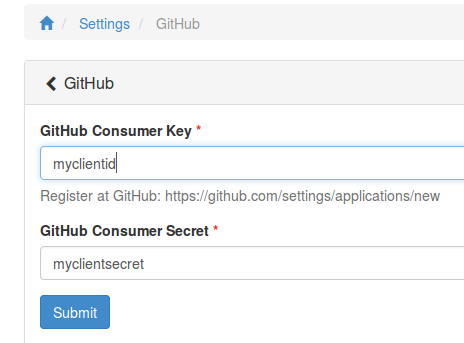
GitHub Support
You can use GitHub accounts to login to Phoenix. GitHub uses OAuth2. First you need to register your Phoenix application at GitHub. Then go to Settings/GitHub in your Phoenix application and enter the GitHub Consumer Key/Client ID and GitHub Consumer Secret/Client Secret:
LDAP Support
Basic support for authentication via LDAP has been added recently. To enable LDAP login for your environment, login with your admin account, navigate to Settings/LDAP and configure Phoenix to match your LDAP environment.
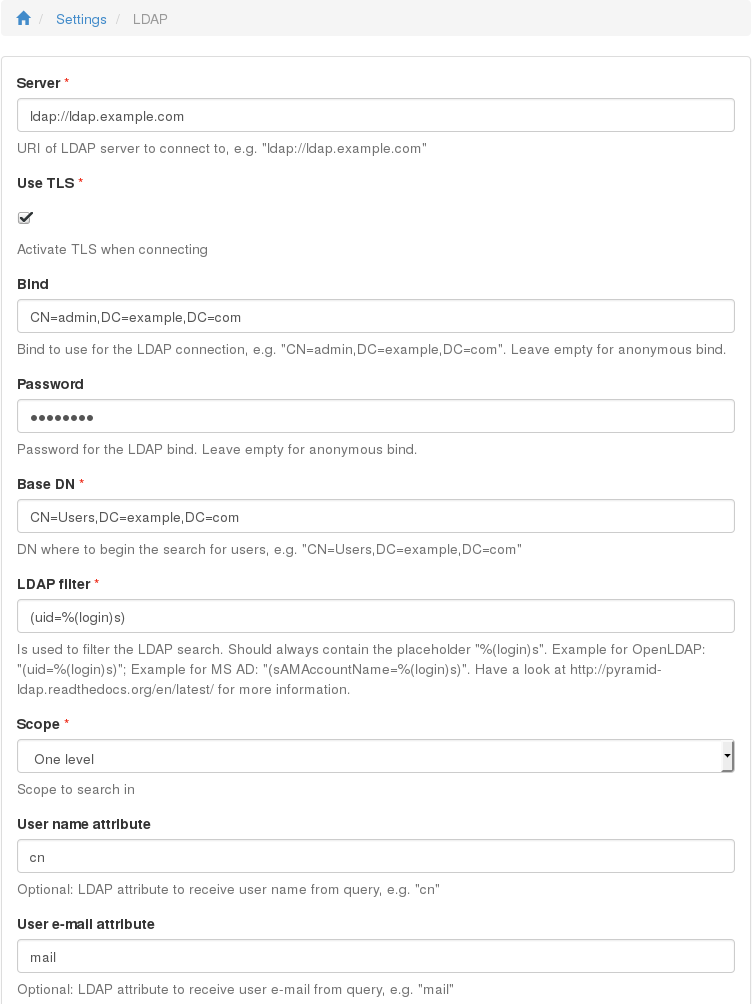
There is no support for LDAP authorization yet. Use the Settings/Users backend to manage the access privileges for your users. There will be an entry for each user that has been logged in once before.
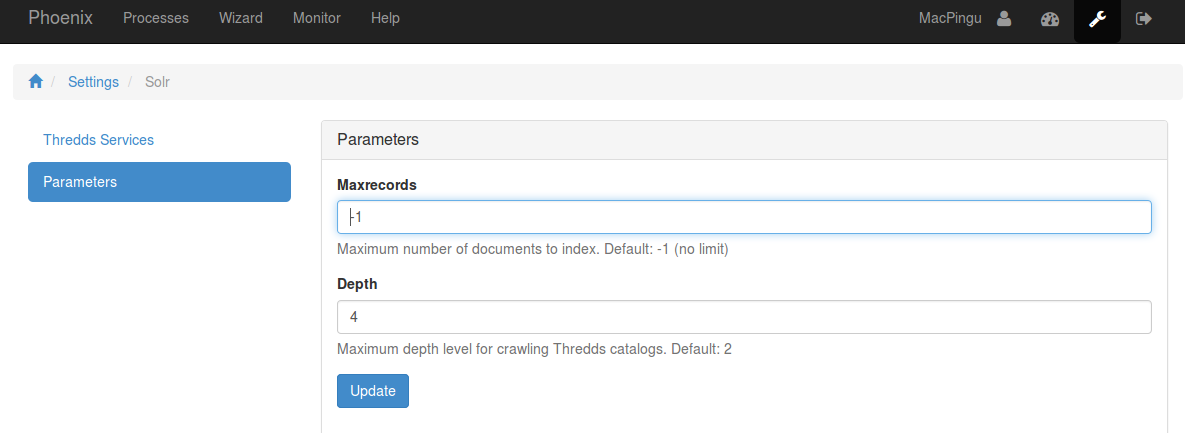
Solr
You can publish the datasets of a registered Thredds service to a Solr index server. The Solr server is setup with the Phoenix installation.
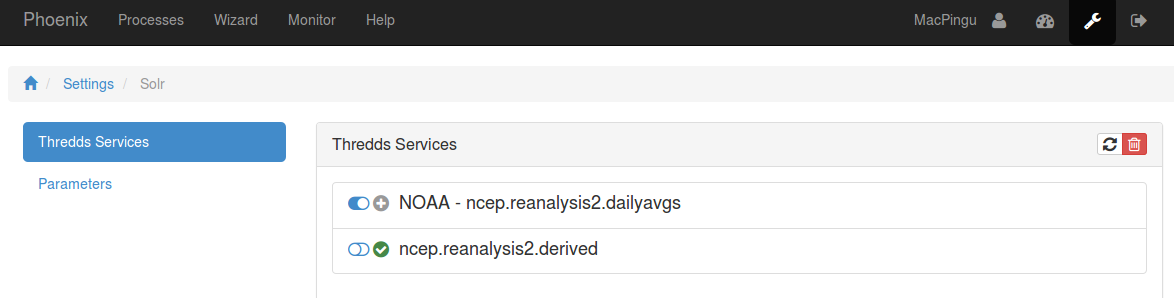
Use the toggle button on the left side of the Thredds service name to activate the publishing. Publishing takes some time. Use the reload button to update the status.
The Solr search can then be used in the Wizard to select input files.
To clear the whole Solr index use the trash button.
The publisher has two parameters.
- maxrecords
- Maximum number of datasets that will be published. Use -1 for unlimited.
- depth
- The maximum depth level when crawling Thredds catalogs. Default is 2.